OK – call me lazy. Tell me I’m not getting the full benefit of my Canon 40D digital SLR camera. Yes I know about RAW files, curves, unsharpening, HDR, etc. But sometimes, well, most of the time, I just want to take pictures and have them look great on screen and printable at anything less than a HUGE print without loads of, ok ANY, computer ‘post processing’.
Little point and shoot digital cameras in decent light situations (i.e., outdoors) take great pictures in most circumstances. But they’re still slow, cannot do shallow depth of field, often don’t have a very wide angle field of view, and to me at least, are generally irritating (except for their size)! Once you’ve seen the quality of pictures and enjoyed the flexibility and range of options and control with an SLR, it’s hard to go back. I know, I tried. Got tired of lugging the Canon 20D and lenses around, sold the lot. But less than a year later, I was ready to throw my Canon point and shoot camera in a fire pit.
With my 20D though I felt EVERY photo file out of the camera needed some, and often a LOT, of post processing on the computer to look decent. I was often a little embarrassed to show people the shots out of the camera. “Yes I know it’s dark, but see how easy it is to fix?” “I know the color is kind of washed out, and it looks a bit out of focus, but see, upping the saturation and a little unsharp filter… makes all the difference… gee aren’t I clever?” I concluded, no Paul, you’re not clever, you’re just spending far too much time having to mess with shots many would consider boring no matter what, just to get something that I could print at 4×6 to stick on the refridgerator.
To get files out of the camera ready to use, that means JPEGs. RAW files can be converted but that’s an extra step. But the 40D lets you save a JPEG and a RAW for each shot, which is great for me. If the JPEG is good enough, use that. If not, use the RAW. The 40D also lets you save large, medium or small JPEG (small) at various quality (compression) levels, with a small or large RAW file. I use the RAW + high quality SMALL JPEG. ‘Small’ is STILL 1936×1288 pixels which is larger than most computer monitors and still a 1.5MB file!
Next is ‘Picture Styles’ which lets you tell the camera what sharpness, contrast, saturation, and color tone to apply to JPEGs. I set Sharpness to 6, Contrast to 0, Saturation to 1, and Color Tone to 0 and save that as a user defined picture style.
Next is exposure compensation. I think in order to protect against ‘blown highlights’ the camera (in my opinion) under exposes just about every shot. So I bump the exposure compensation by just 1/3 a stop.
Finally, I have turned on Highlight Tone Priority (Custom Function II: Image, setting 3, set to 1). This tells the camera to try to preserve some dynamic range (different shades) in bright regions of a picture by adjusting the interpretation of exposure and color. The only trade-off of this is it then makes ISO 200 the minumum ISO, but that’s never a problem for me with a fast lens [amazonify]B000EW8074::text:thehigginswebsit:::(the amazing EF-S 17-55/2.8 IS)[/amazonify].
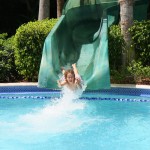
Here’s an example of the results – this is unretouched, right out of the camera (click on this to see the actual picture):
